
Volvo Amazon Inner wing Repair - Part 2

Volvo_Amazon_Restoration

As indicated in the previous post, the intention was to work on to the rear offside arch next, but the inner arch repair sections still haven't arrived. It seems that they are out of stock with the wholesalers in Sweden, and that there is no indication of when, or even if they will be delivered. I am now beginning too think that I will be lucky to see them before Christmas. Change of plan then. I have re-jigged the garage and I have turned the car round to create space to start on the nearside inner wing. There is also the windscreen corner and battery box to sort out, so this should keep me busy for a while.

Just like with the offside repair panel, I noticed that there was a problem with the wing bolt hole alignment, although in this case it appeared to be less pronounced. I judged that it would still necessitate removing of the box section from the rest of the repair panel. 

The existing inner wing was in a poorer condition on this side and so I need to replace at least some of the inner wing wall itself, not just the top strip and box as had been the case with the offside. On inspection I decided that the best course of action was to replace the wall up to the seam with the scuttle panel. I drilled the spot welds to separate.


I also drilled out the welds to the front panel and then after a considerable amount of measuring, drawing, marking and deliberating, I psyched myself up to finally cut away the inner wing.

Then began the protracted process of offering, trimming and aligning the new inner wing.


I  decided to keep the flange along the bottom edge, as I intended to spot weld from underneath, then seam weld along the joint from above. This I believed would ultimately give more strength. Overall I achieved a good fit although some modification to the was needed to match accurately the area towards the bulkhead. I am not sure if this is a limitation of the repair panel, or if there is some difference in the pressing of the wheel well on my car (being a late version).

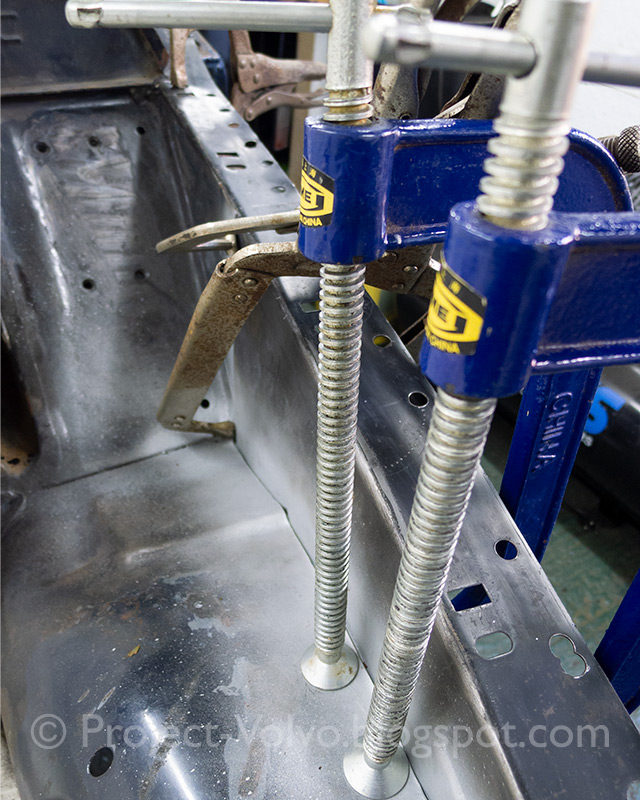
Once I was confident of position, I clamped up and welded.


Again I found grinding/cleaning the welds difficult in the corners and I will definitely need to work on a better solution and have another go before final prep/painting.

The last stage of the repair was to fit the box section which with a small amount of adjusting to fit acutely around the swagging in cowling panel, lined up well. I managed to plug weld around 60%, then disaster. My welder just stopped working. There was power to the unit, the fan was working, but no wire feed and no power to the torch... I gave up for the day.

The next morning I tried again, but to no avail (I was hoping that it was just a thermal cut-out from over heating). After some further research and fruitless fiddling, I decided that I was not prepared to invest any more time or money in what was a very old, basic welder - time to get a new one. I have now I bought a machine from R-Tech. Wow! So much better than the old one, should of bought it years ago.


So finally, the inner wing is now finished. On then, to the windscreen corner and battery box.


Comments

Popular posts from this blog

Boot (Trunk) Excavation

As I suspect you are aware, issues with rot in the boot (trunk) of the Volvo 120 series are common and my Amazon is no exception. Over the years it has been 'repaired' a number of times and not always sympathetically. I have made a start removing the filler and the patchwork of metal plates that make up the n/s and the floor next to the spare wheel well.  I've ground off some of the welds, chiselled and bent back the non-original metal.  As I have already reported the lower rear quarter replacement panels are definitely not correctly positioned but I have successfully managed to uncover the original boot floor which although is in a very poor condition, does give me some points of reference for the rebuild. Incidentally, a word of warning. I had to remove a lot of seam sealer and I really should have been wearing gloves. A slip with the scraper brought the session to a rapid conclusion. I was lucky not to end up in A&E. Now that I have investigated more tho...

Tooling Up: DIY Sheet Metal Brake

My new 1mm sheet steel has arrived, along with some additional angle and flat bar... but more of that in a moment. Using the refined ply forms , I have now made the boot floor rear edge piece again and I am much happier with it.  Going for the extra gauge steel was definitely the right decision and this new panel feels much more substantial. I have had a full test fitting with all panels, which is looking pretty good. The next issue concerns the rear inner arch to which spare wheel well side and floor is to be attached. There is some rust here and so this will need to be repaired before the really serious welding/reconstruction of the boot floor can begin. Although only a relatively small area, complex curves and profiles need to be created. I realised then that I had need of more fabrication tools. Here then is a description of how I fashioned a DIY sheet metal brake; a means by which I can easily and precisely create folds in sheet metal of up to around 90˚or so. This constructio...

Volvo Amazon Chassis Repairs

As suggested in my recent post, the job I originally planned at this point was to repair the battery tray which is in a bit of a state. However, even after an extensive staring, prodding and rumination, I still haven't come up with a strategy. The curves and swaging in this pressing are really quite complex, I am simply not ready to tackle this.  "Does it really matter what it looks like?" I hear you cry, "Won't it be hidden?" Well, actually I think it does, not least of all as I am planning to relocate the battery to the boot (trunk) and utilise the tray in some other way (the current thinking is to locate an oil catcher here, which is required for competition). If so, the repairs will indeed be visible. I've decided to ignore it for the time being and come back to it later. Instead I have turned my attention to the rear arches, starting with the offside. I knew that there are some repairs required to the chassis and the area above the spring locator. I...