Volvo P120: O/S Boot (Trunk) Floor Pt. 2


Picking up from where we left off, I had decided that I needed to create a controlled curve in the panel that I was creating for the front part of the O/S boot floor. I felt I needed a slip roller, or something similar. Researching available tools it soon became apparent that cost was disproportionate, given that it was entirely possible that I would never need this tool again, and so a 'DIY' solution was required. A couple of hours on YouTube and a root through the scarp metal bin... I came up with a plan.

I used a couple of scrap bearings salvaged from Mazda Bongo idler pullys, two Ikea desk legs and an old HiFi speaker stand. The bearings fitted perfectly into the ends of the desk legs, great, so I then fitted some bolts and washers through the centre go the bearings as spindles. On the other end of the legs I found a couple more bolts that fitted snuggly into the plastic feet. Obviously not a robust solution, but I figured strong enough to last the short time required.


I then created two end brackets. I took the top of the old speaker stand and cut it in half. I flipped one half over, then bolted the two together using existing holes. Next I measured and drill two holes through the two plates, representing the thickness of the rollers plus 2mm to allow for the thickness of the steel to be rolled. 

I then cut two pieces from scrap bar and welded them at 90ยบ to complete the end brackets. The hole apparatus was the assembled by drilling and bolting to the bench.


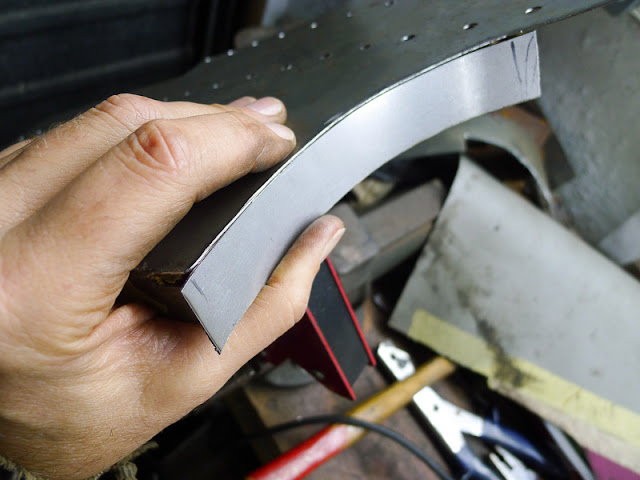
Now of course this isn't a proper slip roller (there are only two rollers for a start) but what I found I was able to do was effect a controlled bend by rolling the piece backwards and forwards through the rollers, whilst applying upward pressure. Sounds somewhat rudimentary, because it is, but hey... it worked.

The panel itself had been cut flat using a card template and now that the curve was added, it was a excellent fit. Using the remnants of the original floor panels (which were still hanging on by a whisker) I marked out the fold for the longitudinal lip, then folded in using my DIY metal brake. I also marked and punched holes for the plug welds.

Finally, I cut strips to form the lip to the inner wheel tub and welded them in position, on the bench.


And here is the finished repair panel.


I have now welded this to the floor and chasis rails and it look pretty neat. It also feels really strong which of course is the most important thing. On to the next panel...


< previous post            next post >

Comments

Popular posts from this blog

Boot (Trunk) Excavation

As I suspect you are aware, issues with rot in the boot (trunk) of the Volvo 120 series are common and my Amazon is no exception. Over the years it has been 'repaired' a number of times and not always sympathetically. I have made a start removing the filler and the patchwork of metal plates that make up the n/s and the floor next to the spare wheel well.  I've ground off some of the welds, chiselled and bent back the non-original metal.  As I have already reported the lower rear quarter replacement panels are definitely not correctly positioned but I have successfully managed to uncover the original boot floor which although is in a very poor condition, does give me some points of reference for the rebuild. Incidentally, a word of warning. I had to remove a lot of seam sealer and I really should have been wearing gloves. A slip with the scraper brought the session to a rapid conclusion. I was lucky not to end up in A&E. Now that I have investigated more tho...

Tooling Up: DIY Sheet Metal Brake

My new 1mm sheet steel has arrived, along with some additional angle and flat bar... but more of that in a moment. Using the refined ply forms , I have now made the boot floor rear edge piece again and I am much happier with it.  Going for the extra gauge steel was definitely the right decision and this new panel feels much more substantial. I have had a full test fitting with all panels, which is looking pretty good. The next issue concerns the rear inner arch to which spare wheel well side and floor is to be attached. There is some rust here and so this will need to be repaired before the really serious welding/reconstruction of the boot floor can begin. Although only a relatively small area, complex curves and profiles need to be created. I realised then that I had need of more fabrication tools. Here then is a description of how I fashioned a DIY sheet metal brake; a means by which I can easily and precisely create folds in sheet metal of up to around 90˚or so. This constructio...

Volvo Amazon Chassis Repairs

As suggested in my recent post, the job I originally planned at this point was to repair the battery tray which is in a bit of a state. However, even after an extensive staring, prodding and rumination, I still haven't come up with a strategy. The curves and swaging in this pressing are really quite complex, I am simply not ready to tackle this.  "Does it really matter what it looks like?" I hear you cry, "Won't it be hidden?" Well, actually I think it does, not least of all as I am planning to relocate the battery to the boot (trunk) and utilise the tray in some other way (the current thinking is to locate an oil catcher here, which is required for competition). If so, the repairs will indeed be visible. I've decided to ignore it for the time being and come back to it later. Instead I have turned my attention to the rear arches, starting with the offside. I knew that there are some repairs required to the chassis and the area above the spring locator. I...